Steps to Reconfigure the Extender via WPS Connection Method
Is there any need to Reconfigure the Extender if Replaced Router Device?
With the rapid change in technology, the lives of people are changing day by day. The needs of the Routers, Repeaters as well as Extenders are also rising. WiFi Extenders are associated as one of the finest devices which are used to enhance the strength of the WiFi signal up to a great extent. Yes, there will be a need to reconfigure the extender if you replace the existing router. You can reconfigure the WiFi Extender either via using the WPS connection or with the help of the Web GUI. In this blog, you will get to know how to reconfigure the extender with a new router with ease. For more information related to the 192.168.188.1 Wireless Extender Setup, then take the guidance of the best technical team of professionals. You may also refer to the official website to get more knowledge about it.

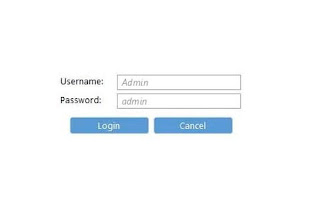
If you have an Extender, then it is obvious that you have to perform the 192.168.188.1 Login in order to configure or change the settings. In case you will be stuck anywhere while login, then you can refer to the device manual.
Steps to Reconfigure the Extender via WPS Connection Method
The process to reconfigure the Extender via WPS Connection Method is quite easy. Here are the simple steps that you should follow:
In case your router supports the WPS, then all you need to do is to press the WPS button on the router/gateway for about 5 seconds. Keep it pressing until you will see that the WPS indicator lights/blinks to start the connection.
Within 60 seconds, all you have to do is to press and hold the WPS button on the extender for a minimum of 5 seconds.
You have to wait for up to 5 minutes until the WPS indicator will stop blinking.
Now you must check if the router link LED on the extender is ON or OFF.
In case the link LED is ON, then the extender is successfully connected with the router’s Wi-Fi network.
If you will see that the link LED is OFF, it means that the extender failed to connect to the router Wi-Fi network. So you have to repeat the initial steps.
In case the WiFi extender & router that you have are dual-band devices, then you need to configure the 5GHz network.
After that, you can simply move the WiFi Extender to its preferred location that is ideally halfway between the router and the area with a low Wi-Fi signal.
In this way, you can easily reconfigure the Extender via WPS Connection Method.
In case you are not able to access the 192.168.188.1 Admin, then reach out to the highly skilled technical team of experts. All the professionals will deeply analyze the issue and then provide the best solutions accordingly. The availability of our professionals is 24*7 hours; so you can drop us a message anytime. Our team members are rich in experience to deal with the common problems of the customers. Feel free to reach us and get rid of the common Extender setup issues.

Comments
Post a Comment